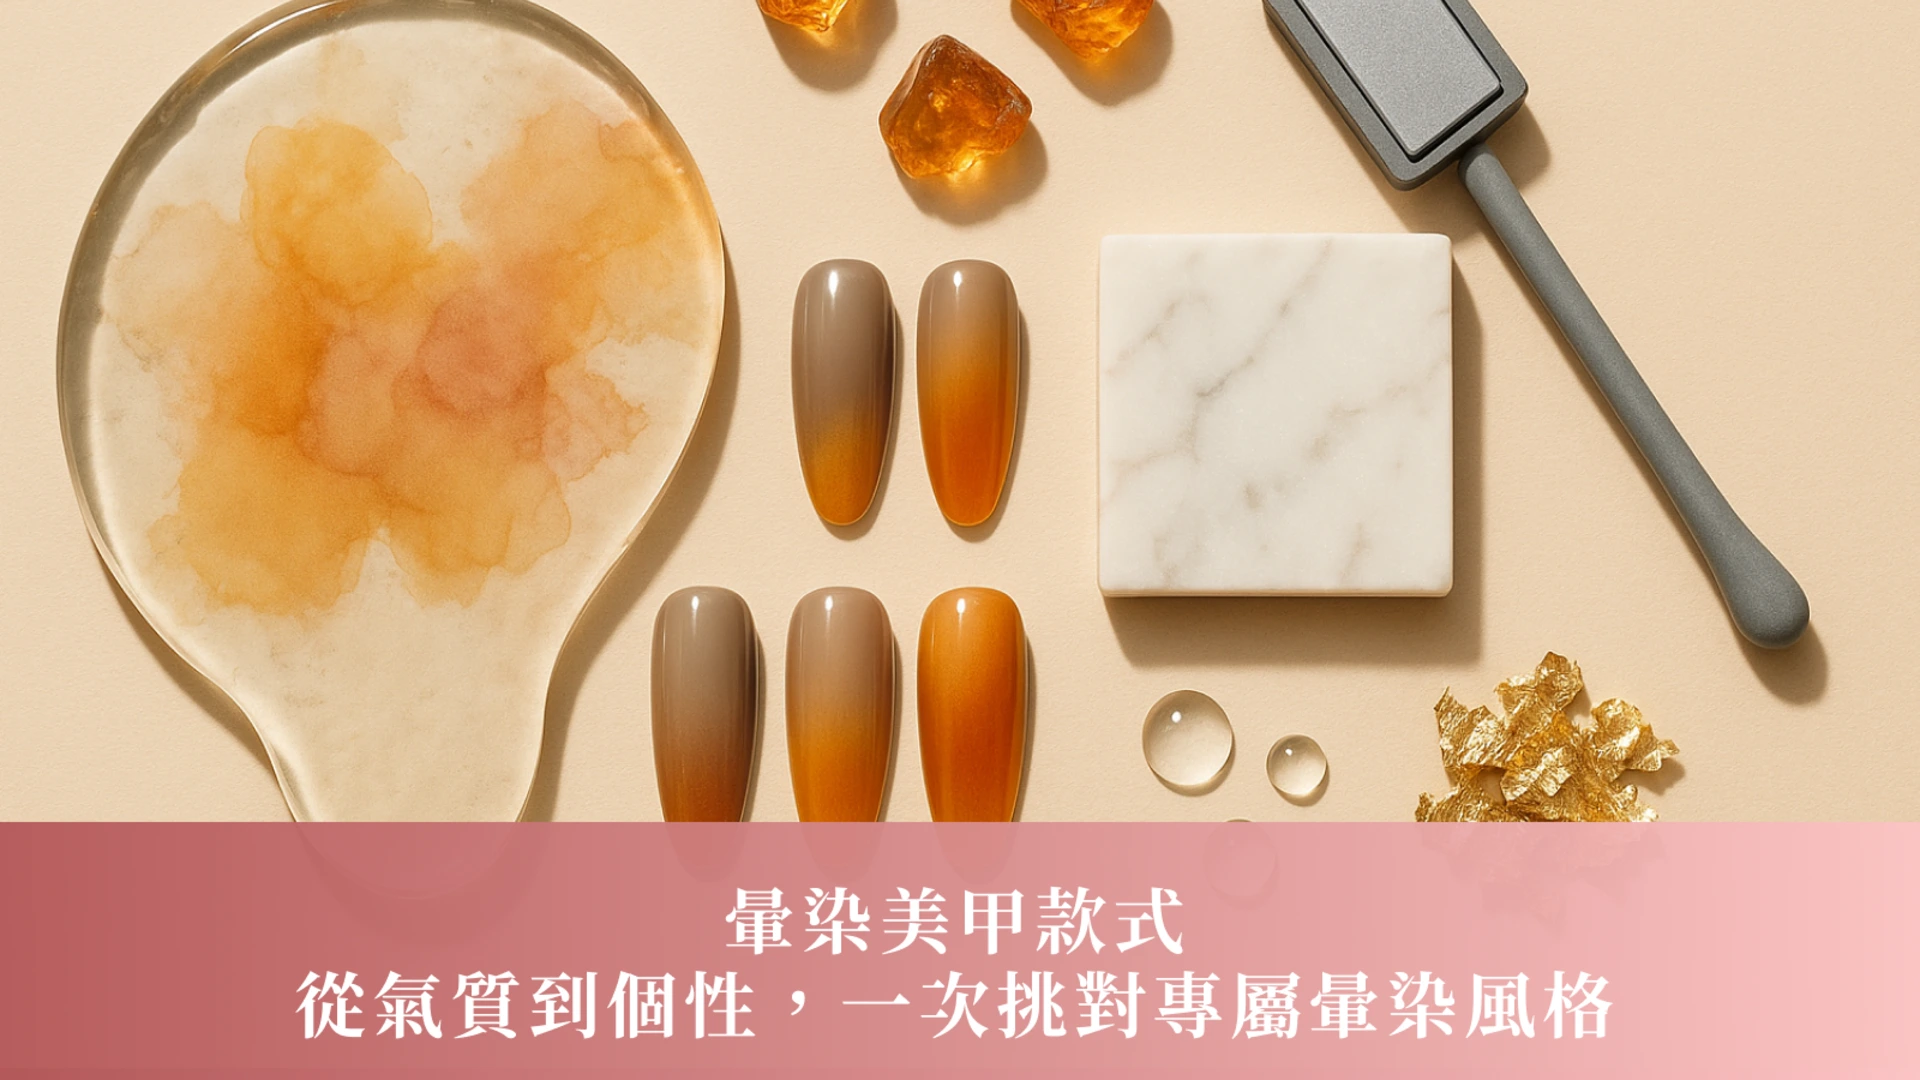
Gradient Nail Art Styles | From Elegant to Individualistic, Choose the Perfect Gradient Style.

Gradient Nail Art Styles | From Elegant to Individualistic, Choose the Perfect Gradient Style.
Looking for inspiration for gradient nail art but overwhelmed by designs? This article breaks down gradient nail art into four main styles based on materials and overall feel: the warm, layered textures of amber, the delicate brushstrokes of watercolor, the clean lines of marble, and the shimmering bands of cat's eye. From hand proportions and nail length to outfit coordination, we guide you in determining the gradient area and where to leave blank spaces, ensuring both a flattering look and everyday wearability. Finally, we provide care tips to keep your nails clean, clear, and uncluttered, making your next manicure more effective.
Gradient Nail Art Designs | The Golden Ratio of Color Selection and White Space
The beauty of gradient ombre lies in "layering × negative space × gloss". For color selection, use skin tone as a guide: for yellowish skin, choose cool pinks and gray-blues to brighten; for cool-toned fair skin, use milk tea or rose brown to warm it up. It's recommended to leave 20-40% negative space to soften the edges and create a cleaner look; for short nails, concentrate the gradient on the front half, while for long nails, extend it to two-thirds to increase the sense of length. For gloss and layering, use two layers of clear gel and very fine glitter to "thinly cover" the nail, avoiding a muddy finish from applying too much color at once. For a subtle and timeless look, lower the saturation and add a small embellishment to create visual focus, making the hands look more refined.
Reference image: Only Nail (@onlynail_2022)
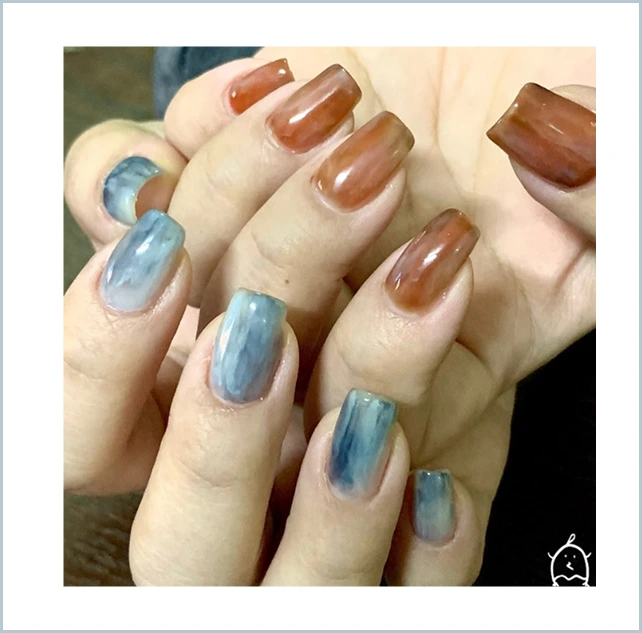
Amber gradient nail art | A versatile style for autumn and winter with a warm and translucent finish
Amber ombre nails achieve a "glassy" look by layering brown, honey tea, and amber orange. To brighten the complexion, add a drop of cool pink or smoky rose to neutralize yellow tones. For a more sophisticated look, focus the ombre on the center of the nail, leaving a light, transparent edge for a natural transition. Use gold foil or fine lines for embellishments to avoid large areas of sequins. Pair it with a knitted top and a camel coat for a chic look. For working professionals, a "one dark, three light, one embellishment" ratio is suitable—sophisticated yet stylish. The key to maintenance is applying thin layers and multiple UV/LED lamps to create clearer layers and prevent the nail from looking dirty.
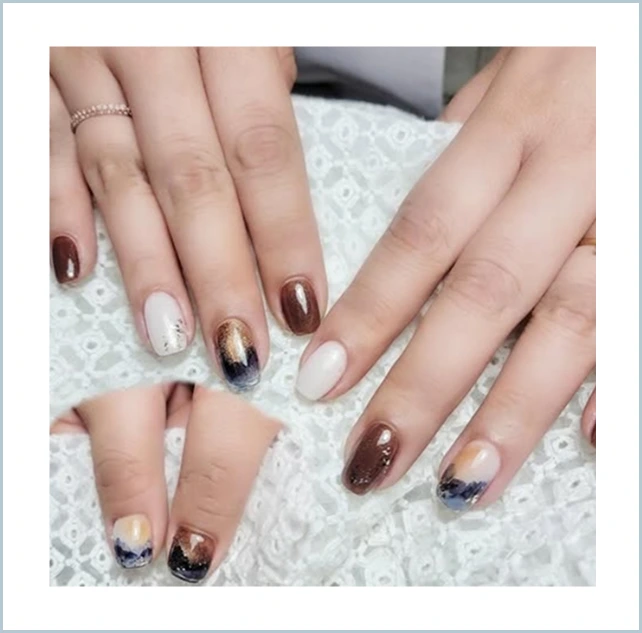
Reference image: Candy Box (@cutecandy520)
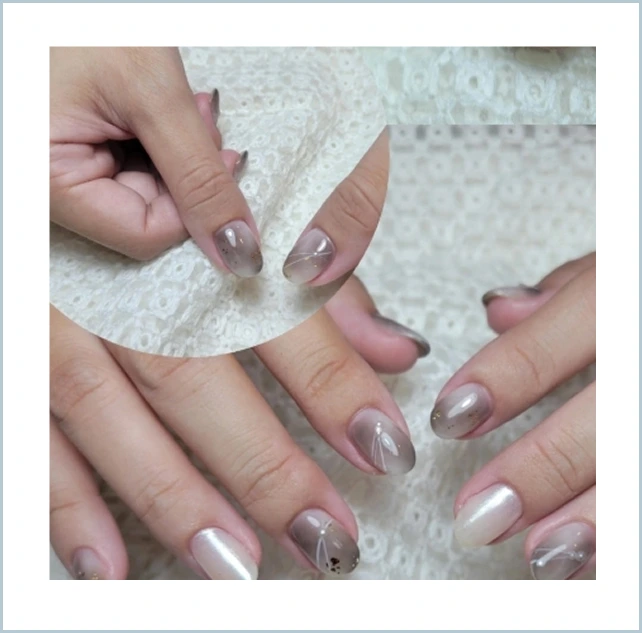
Watercolor Smudge Nail Art | A Delicate and Ethereal Look
Watercolor ombre nail art emphasizes "thin washes and white space," using milky white, matte pink, and matte blue as a base, then adding 1-2 colors with light patting. The key is to achieve blurred but not muddy edges: each layer of color should be "almost transparent" before applying the second layer; to deepen the layers, add a drop of dark color to the center area and immediately blend it out. For a low-key and practical look, opt for a single-color "watercolor ombre nail art" look, while for formal occasions, add fine gold lines or subtle glitter to the ring finger to enhance the overall look. For short nails, keep the color block in the center of the nail surface to create a more elongated appearance.
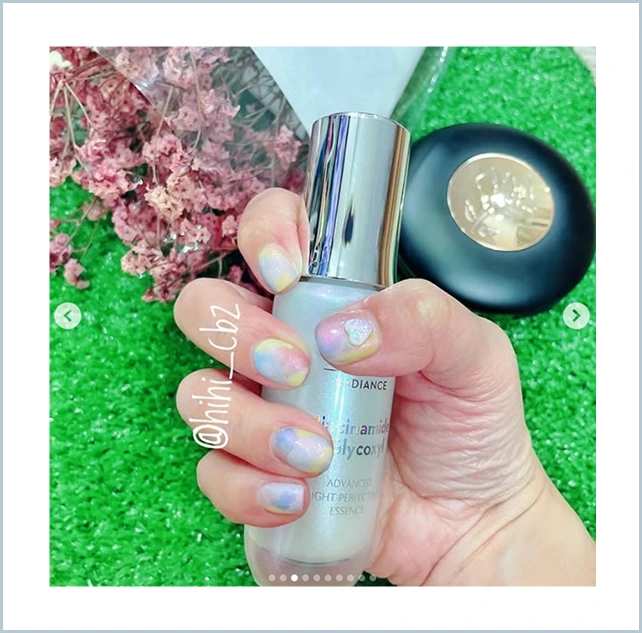
Reference image by HiHi_Cbz (@hihi_cbz)
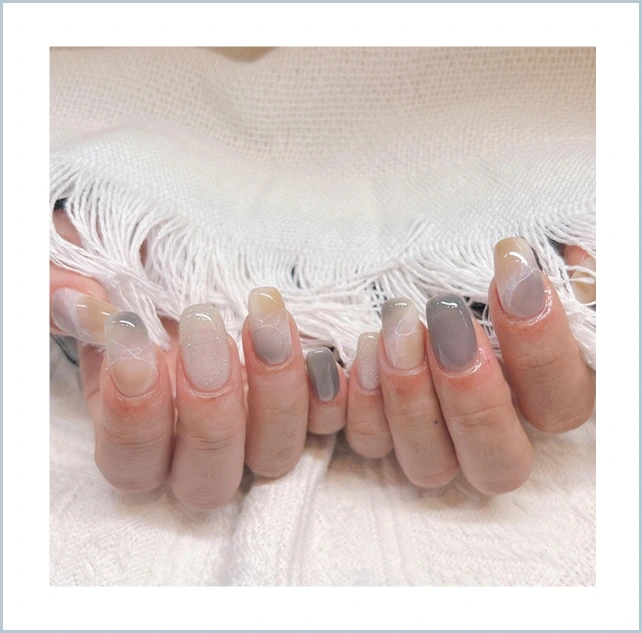
Marble gradient nail art | A sophisticated urban vibe with sleek textures
Marble ombre nail art uses gray and milky white as a base, with ink lines drawn to create texture, then "dispersed" with a very light misty gray or translucent golden brown. To avoid being too harsh, you can add milk tea ombre to two fingers to neutralize it; for a more sophisticated look, try "black and white marble × transparent white space" for a fashionable touch. For work settings, a short square or round square shape is recommended for clearer lines. On decorative pieces, fine gold foil accents are cleaner than full gold; for a more sophisticated look in photos, layer a mirrored top to make the texture more three-dimensional.
Reference image by Wanda (@wanda77_nails)
Cat-eye smudge nail art | shimmering, layered glitter
The key to a cat-eye ombre effect is the placement of the "light strip." For a shaped nail, place the magnetic powder light strip slightly above the center of the nail surface to subtly elongate it. For a more glamorous look, create a "slanted light strip," layering it with deep burgundy or night sky blue for a super-bright effect under lights. For a more understated everyday look, choose a milky apricot or Morandi gray as a base, adding the light strip only on two nails. Pay attention to thickness control: both the magnetic powder and gel color should be applied thinly to prevent blistering. If you frequently use a computer, keep the light strip away from the area where your fingertips touch for a more durable and less prone to smudging look.
Reference image: Candy Box (@cutecandy520)
Choosing the right gradient nail art design can give your fingertips a "breathable" feel.
The beauty of a gradient effect lies in the mastery of negative space and layering. First, decide on the occasion and your outfit, then choose the color that best suits your taste, from amber, watercolor, marble to cat's eye. Remember to apply thin coats with varying thickness and create layers of shine for a more transparent and clean color. For maintenance, apply multiple thin coats and ensure the edges are properly sealed. Avoid hot water and alcohol for 72 hours after application, and wear gloves when doing housework. Apply hand cream or sunscreen to the back of your hands first, then to your fingertips to reduce the oil film. If small cracks or peeling occur, do not pry them off forcefully; instead, remove the nail polish with nail polish remover and return to the salon for a touch-up.
Key points of gradient nail art designs | Style × Occasion matching
- Ombre nail art: First decide on the occasion and outfit, then choose the color and the white space; leave about 20-40% white space, apply multiple thin coats with layered shine. For short nails, concentrate the front edge; for long nails, extend to 2/3; apply a thin top coat 7-10 days after the procedure to maintain shine.
- Amber ombre: Perfect for everyday commutes and elegant dates; it pairs best with knitwear and a camel coat.
- Watercolor wash: A light and formal look for a girls' gathering; soft mist colors with delicate gold lines that don't overpower the overall effect.
- Marble gradient: For business and presentation days; short square nails in black and white or milk tea color schemes look more sophisticated.
- Cat-eye gradient: for dinner parties and parties; dark, diagonally cut light strips look the most glamorous.

